以前の記事でRails6、Ruby2.6.3、MySQLの環境をDockerで作るというのを書きました。しかし、実際に本番環境にデプロイしてアプリケーションを使うとなると結局ウェブサーバを通して処理を実行することになるなと思ったので、今回はNginxを使って環境を作る方法をまとめたいと思います。
前回の記事はこちらです。最初はnginxなんて使わなくていいやという方はこちらの記事の方が良いかもしれません。本記事よりもやや簡単です。
前提
下記はすでに済ませているということを前提として本記事を書かせていただきます。
- Rails6のプロジェクトがもうある
- Dockerがインストールされている
- docker-composeがインストールされている
筆者の環境
docker-compose
$ docker-compose -v
docker-compose version 1.22.0, build f46880f
docker
$ docker -v
Docker version 18.06.1-ce, build e68fc7a
rails
$ rails -v
Rails 6.0.0
ちなみにRailsのプロジェクト名は `neptune`です。お笑いトリオのネプチューンは確かに好きですが、あの3人組にちなんでつけたものではありません。プロジェクトネームには星の名前や自然現象の名称をつけるようにしているためです。
さて、ここから必要ファイルを眺めていきましょう。コピペしてお使いになる際は、プロジェクト名を変えて使ってください。
また、ここで書かれている手法はrails6に限った話ではありません。railsの別バージョンでも使うことができます。
Dockerfile
Dockerfileは、rails用とnginx用の2つを用意します。
Rails
# Dockerfile
FROM ruby:2.6.3-alpine
ENV PROJECT neptune
RUN mkdir -p $PROJECT
WORKDIR $PROJECT
RUN apk add git
RUN apk add --update bash perl
RUN apk add libxslt-dev libxml2-dev build-base
RUN apk add mysql-client mysql-dev
RUN apk add --no-cache file
RUN apk add yarn --no-cache
COPY . ./
RUN bundle install
RUN yarn install
VOLUME /$PROJECT
# puma.sockを配置するディレクトリを作成
RUN mkdir -p tmp/sockets
RUN mkdir -p /tmp/public && \
    cp -rf /neptune/public/* /tmp/public
Nginx
# nginx/Dockerfile
FROM nginx:1.17.4-alpine
# インクルード用のディレクトリ内を削除
RUN rm -f /etc/nginx/conf.d/*
# Nginxの設定ファイルをコンテナにコピー
ADD nginx.conf /etc/nginx/conf.d/neptune.conf
# ビルド完了後にNginxを起動
CMD /usr/sbin/nginx -g 'daemon off;' -c /etc/nginx/nginx.conf
基本的に元となるイメージは `alpine`を使っています。軽いので。
nginx.conf
nginxの設定ファイルを作ります。localhostで入ってきたら、Railsの `puma`サーバを向くように設定します。
# nginx/nginx.conf
# プロキシ先の指定
# Nginxが受け取ったリクエストをバックエンドのpumaに送信
upstream neptune {
  # ソケット通信したいのでpuma.sockを指定
  server unix:///neptune/tmp/sockets/puma.sock fail_timeout=30s;
}
server {
  listen 80;
  # ドメインもしくはIPを指定
  server_name localhost;
  # ドキュメントルートの指定
  root /neptune/public;
  large_client_header_buffers 4 32k;
  client_max_body_size 100m;
  error_page 404             /404.html;
  error_page 505 502 503 504 /500.html;
  try_files  $uri/index.html $uri @neptune;
  keepalive_timeout 120;
  # リバースプロキシ関連の設定
  location @neptune {
    proxy_ignore_client_abort on;
    proxy_read_timeout 300;
    proxy_connect_timeout 300;
    proxy_set_header X-Real-IP $remote_addr;
    proxy_set_header X-Forwarded-For $proxy_add_x_forwarded_for;
    proxy_set_header Host $http_host;
    proxy_pass http://neptune;
  }
}
puma.rb
この、nginxを噛ませる方式では rails sではなく、pumaを起動することになります。のでpuma.rbを少しいじっていきます。
pumaを起動した際に、 puma.sockというソケットを生成するようにします。
# config/puma.rb
# Puma can serve each request in a thread from an internal thread pool.
# The `threads` method setting takes two numbers: a minimum and maximum.
# Any libraries that use thread pools should be configured to match
# the maximum value specified for Puma. Default is set to 5 threads for minimum
# and maximum; this matches the default thread size of Active Record.
#
max_threads_count = ENV.fetch("RAILS_MAX_THREADS") { 5 }
min_threads_count = ENV.fetch("RAILS_MIN_THREADS") { max_threads_count }
threads min_threads_count, max_threads_count
# Specifies the `port` that Puma will listen on to receive requests; default is 3000.
#
port        ENV.fetch("PORT") { 3000 }
# Specifies the `environment` that Puma will run in.
#
environment ENV.fetch("RAILS_ENV") { "development" }
# Specifies the `pidfile` that Puma will use.
pidfile ENV.fetch("PIDFILE") { "tmp/pids/server.pid" }
# Specifies the number of `workers` to boot in clustered mode.
# Workers are forked web server processes. If using threads and workers together
# the concurrency of the application would be max `threads` * `workers`.
# Workers do not work on JRuby or Windows (both of which do not support
# processes).
#
# workers ENV.fetch("WEB_CONCURRENCY") { 2 }
# Use the `preload_app!` method when specifying a `workers` number.
# This directive tells Puma to first boot the application and load code
# before forking the application. This takes advantage of Copy On Write
# process behavior so workers use less memory.
#
# preload_app!
# Allow puma to be restarted by `rails restart` command.
plugin :tmp_restart
# ここから下を追記--------------------------------------------
app_root = File.expand_path("../..", __FILE__)
bind "unix://#{app_root}/tmp/sockets/puma.sock"
stdout_redirect "#{app_root}/log/puma.stdout.log", "#{app_root}/log/puma.stderr.log", true
docker-compose.yml
# docker-compose.yml
version: '3'
services:
  db:
    image: mysql:5.7
    environment:
      MYSQL_DATABASE: neptune_development
      MYSQL_USER: root
      MYSQL_ROOT_PASSWORD: afsj3aj8Dj3
    tty: true
    ports:
      - 3306:3306
    command: mysqld --character-set-server=utf8mb4 --explicit_defaults_for_timestamp=true
  rails:
    build:
      context: .
    volumes:
      - .:/neptune
      - /neptune/node_modules
      - public-data:/neptune/public
      - tmp-data:/neptune/tmp
      - log-data:/neptune/log
    environment:
      RAILS_ENV: development
    depends_on:
      - db
    command: sh scripts/launch.sh
  nginx:
    build:
      context: ./nginx
    ports:
      - 80:80
    depends_on:
      - rails
    volumes:
      - public-data:/neptume/public
      - tmp-data:/neptune/tmp
volumes:
  public-data:
  tmp-data:
  log-data:
起動スクリプト
コンテナ起動時に実行するスクリプトを作成します。これは別にこのようにスクリプトファイルを作らなくても、Dockerfileの中に `CMD`で書いても良いです。しかし、修正がしやすい(またイメージを作らなくても良い)ので僕はこのように起動スクリプトを用意しています。
# scripts/launch.sh
bundle exec rake db:migrate
cp -rf /tmp/public/* /neptune/public/
mkdir -p tmp/sockets
bundle exec puma -C config/puma.rb
さて、これで準備はできました。
ではコマンドでイメージ作成し、コンテナを起動させてみましょう。
イメージ作成
まずはイメージを作成します。
$ docker-compose build --no-cacheこれ、結構時間かかります。10分とはいかないまでも7-8分程度かかると思います。
コンテナ起動
$ docker-compose upこちらは比較的早く終わります。下記のようなログが出れば成功です。
rails_1  | Puma starting in single mode...
rails_1  | * Version 3.12.1 (ruby 2.6.3-p62), codename: Llamas in Pajamas
rails_1  | * Min threads: 5, max threads: 5
rails_1  | * Environment: development
rails_1  | * Listening on tcp://0.0.0.0:3000
rails_1  | * Listening on unix:///neptune/tmp/sockets/puma.sock
rails_1  | Use Ctrl-C to stop
これを見るとわかるのですが、pumaのソケットを見るようになっています。
ブラウザでアクセス
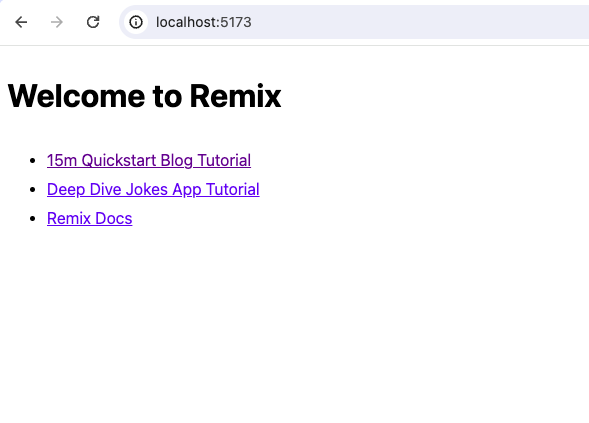
これまではポートを指定してアクセスしていましたが、今はポートなしでいけます。
http://localhost
上のリンクをクリックしてみてください。下記のような画面が出れば成功です。

また、Chromeのディベロパーコンソールの networkを見てみると、確かに Nginxを通じてアクセスしていることがわかります。

以上、最後までお読みいただきありがとうございました。