
はじめに
RailsではフロントエンドとしてのViewがデフォルトで提供されています。つまりサーバ処理と画面表示の両方を1つのプロジェクトで管理できます。
しかし、場合によってはフロントは別で管理してRailsはAPIを提供するのみにとどめたいというプロジェクトもあります。
本記事ではRailsプロジェクトをAPIモードで作成する方法をまとめます。
また、本記事ではホストPCにはRubyやRailsはインストールせず、Docker内で完結するよう環境を構築していきたいと思います。
使うもの
- Rails7
- Ruby 3.0
- MySQL 8
- Docker
- docker-compose
筆者の環境
- M1 Mac BigSur 11.4
- docker-compose 1.29.2
- Docker 20.10.7
やること
- Rails7のプロジェクト作成
- Controller作成
- curlコマンドで挙動確認
Rails7のプロジェクト作成
以前Rails7の環境構築を行う記事を書きましたので、そちらを参考にRails7のプロジェクトを作成してください。
ただし、プロジェクト作成のコマンドは以下を使ってください。それ以外は記事をそのままコピペしてください。
rails new . -d mysql --apiControllerを作成する
以下のコマンドを使ってControllerを作成します。
# コンテナに入る
% docker-compose exec app bash


# コンテナ内で以下を実行する
root@93bcfa663d74:/app# rails g controller sample_controller index create update delete
      create  app/controllers/sample_controller.rb
       route  get 'sample/index'
              get 'sample/create'
              get 'sample/update'
              get 'sample/delete'
      invoke  test_unit
      create    test/controllers/sample_controller_test.rb
sample_controllerが作成されましたね。
ここで、デフォルトだと全てのアクションが getで設定されてしまうので、config/routes.rbを直していきます。本記事では以下のように設定します。
Rails.application.routes.draw do
  get 'sample/index'
  post 'sample/create'
  put 'sample/update'
  delete 'sample/delete'
end
さて、これでルーティングも終わりました。
ではControllerを少しいじってどのアクションが呼び出されているか分かりやすくしてみましょう。
デフォルトだと以下のようになっています。
class SampleController < ApplicationController
  def index
  end

  def create
  end

  def update
  end

  def delete
  end
end
これを以下のように修正していきます。
class SampleController < ApplicationController
  def index
    render json: { 'message': 'this is index' }
  end

  def create
    render json: { 'message': 'this is create' }
  end

  def update
    render json: { 'message': 'this is update' }
  end

  def delete
    render json: { 'message': 'this is delete' }
  end
end
これで準備OKです。アクセスして出力を見てみましょう。
curlコマンドで挙動確認
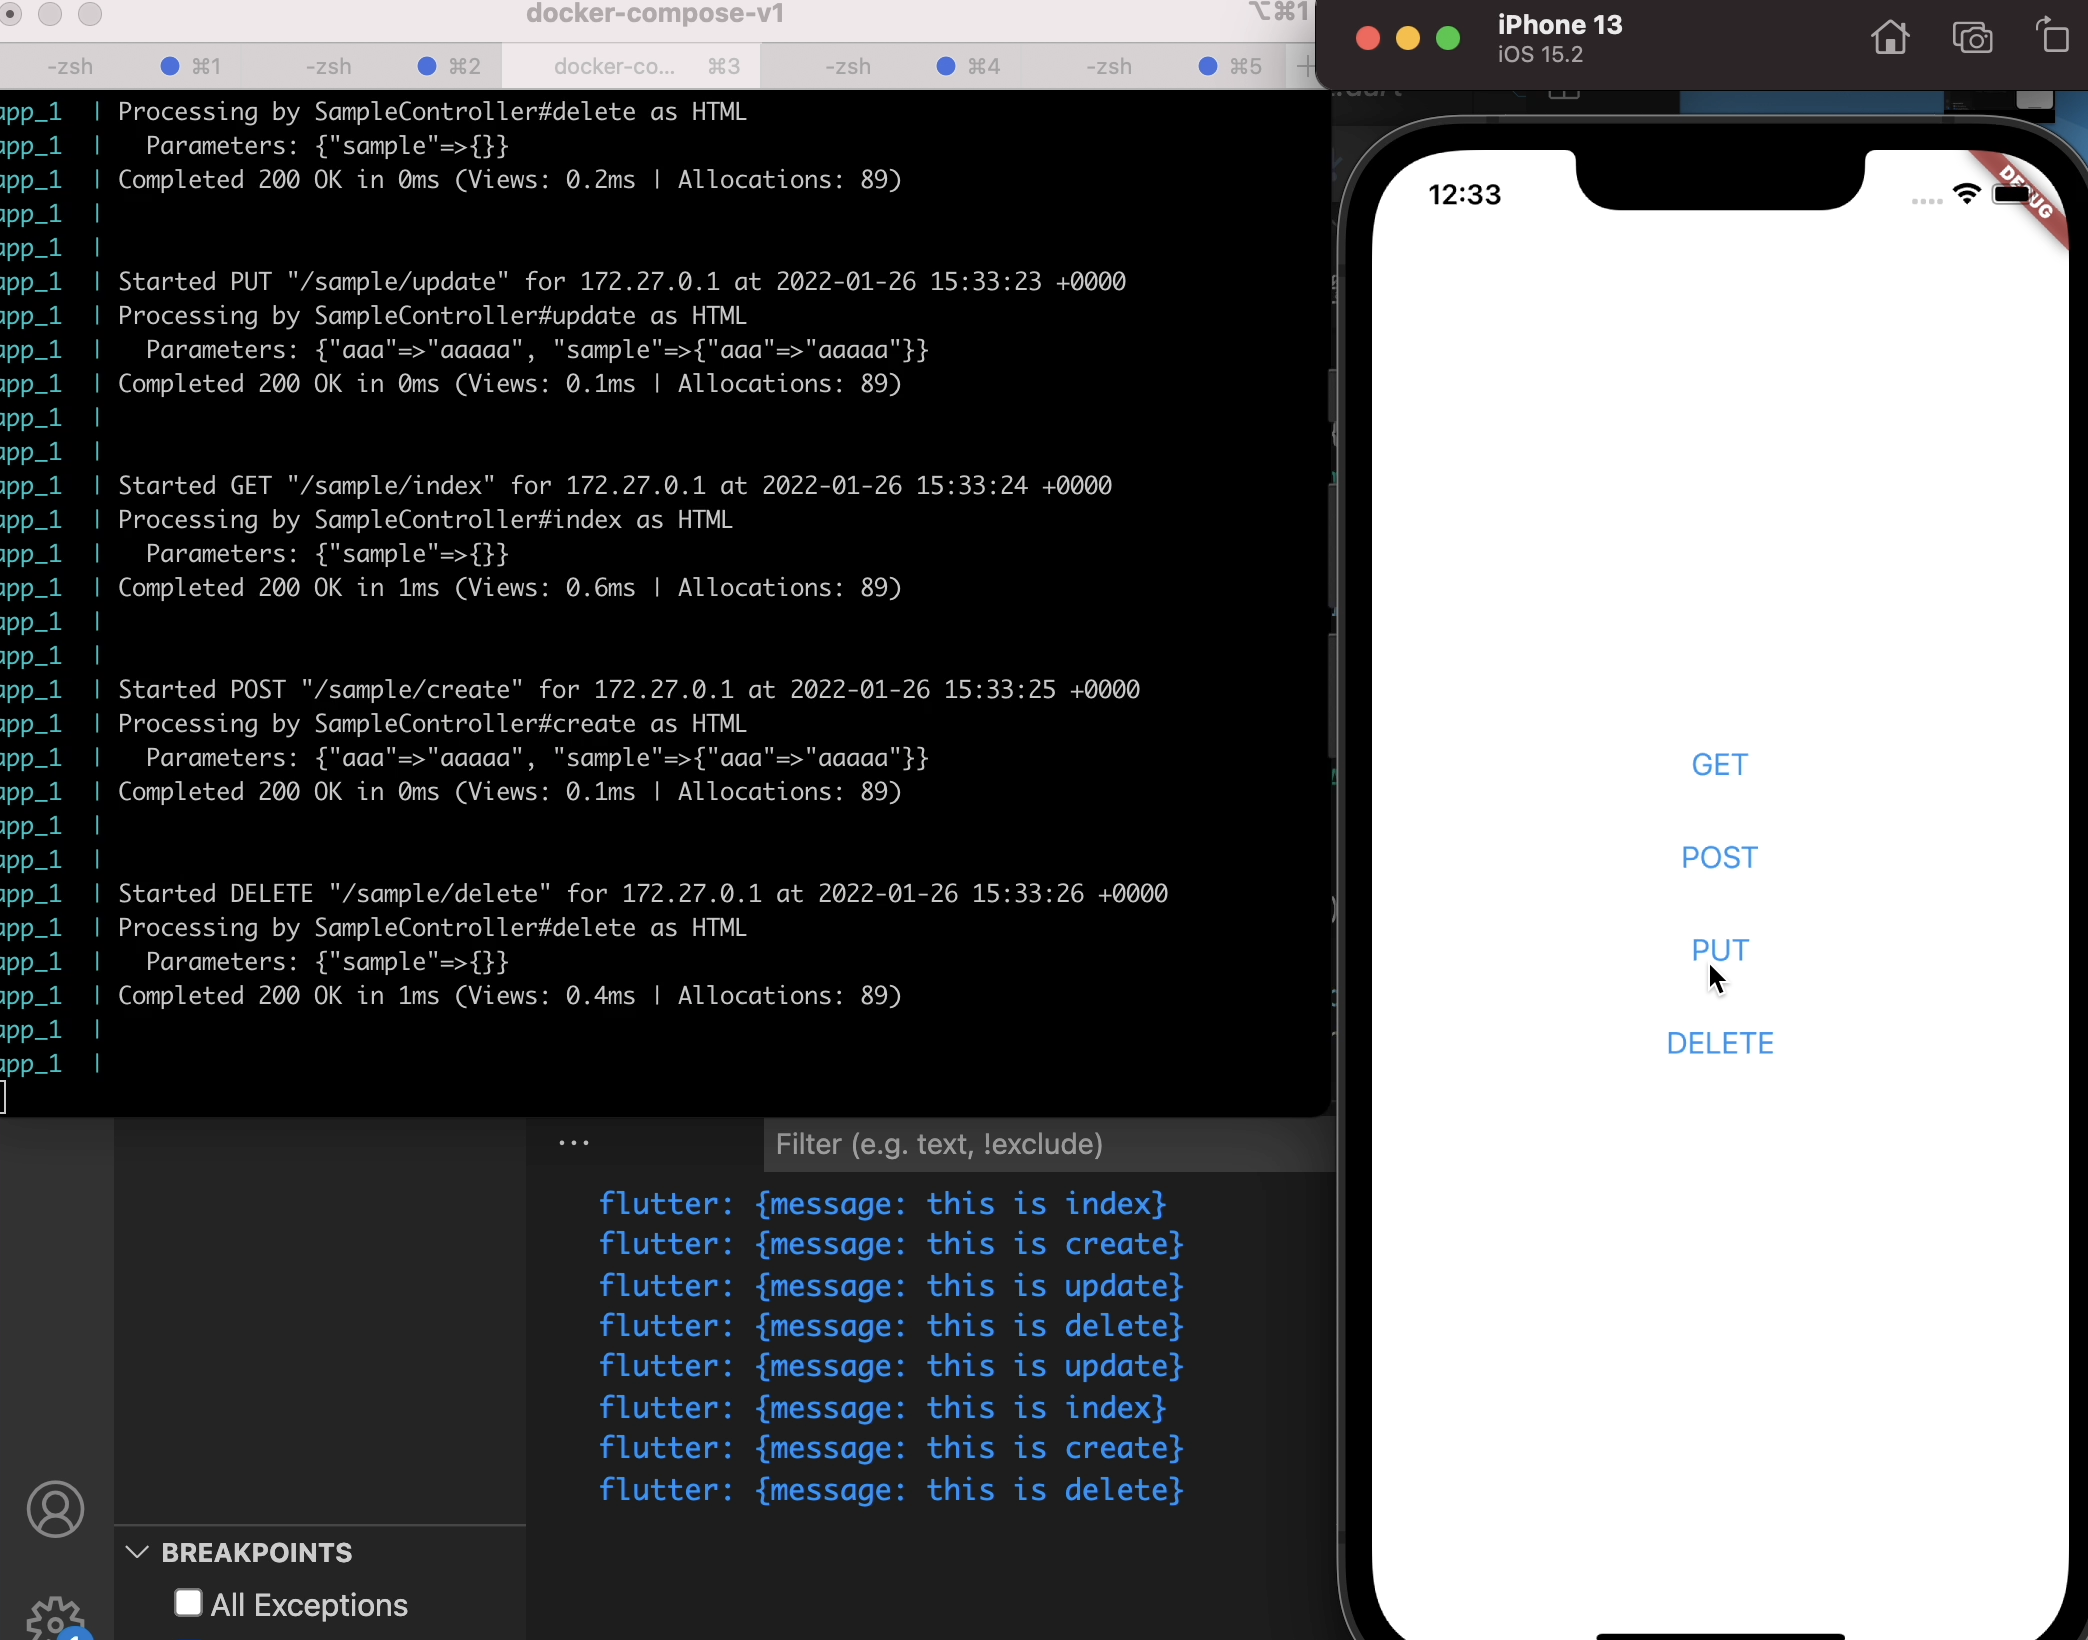
ブラウザでURL直打ちだとgetしか挙動確認できないのでここはcurlコマンドで各々のアクションを確認していきましょう!
% curl -X GET http://localhost:3000/sample/index
{"message":"this is index"}

% curl -X POST http://localhost:3000/sample/create
{"message":"this is create"}

% curl -X PUT http://localhost:3000/sample/update
{"message":"this is update"}

% curl -X DELETE http://localhost:3000/sample/delete
{"message":"this is delete"}
ちゃんと各々のアクションで処理が実行されていることが確認できましたね。
以上、簡単ではありますがdocker-composeでRails7でAPIクライアントを作成する方法のまとめでした。最後までお読みいただきありがとうございました。
Ruby、Rails、Dockerの書籍のご紹介